20 DIY Dollar Tree Centerpieces
Creating beautiful and budget-friendly centerpieces can be a delightful and rewarding experience, especially when you shop at Dollar Tree.
In this article, we’ll explore 21 DIY Dollar Tree centerpieces that will add charm and elegance to any occasion.
Let’s dive into these DIY projects!
Recommended Centerpieces


DIY Dollar Tree Centerpieces

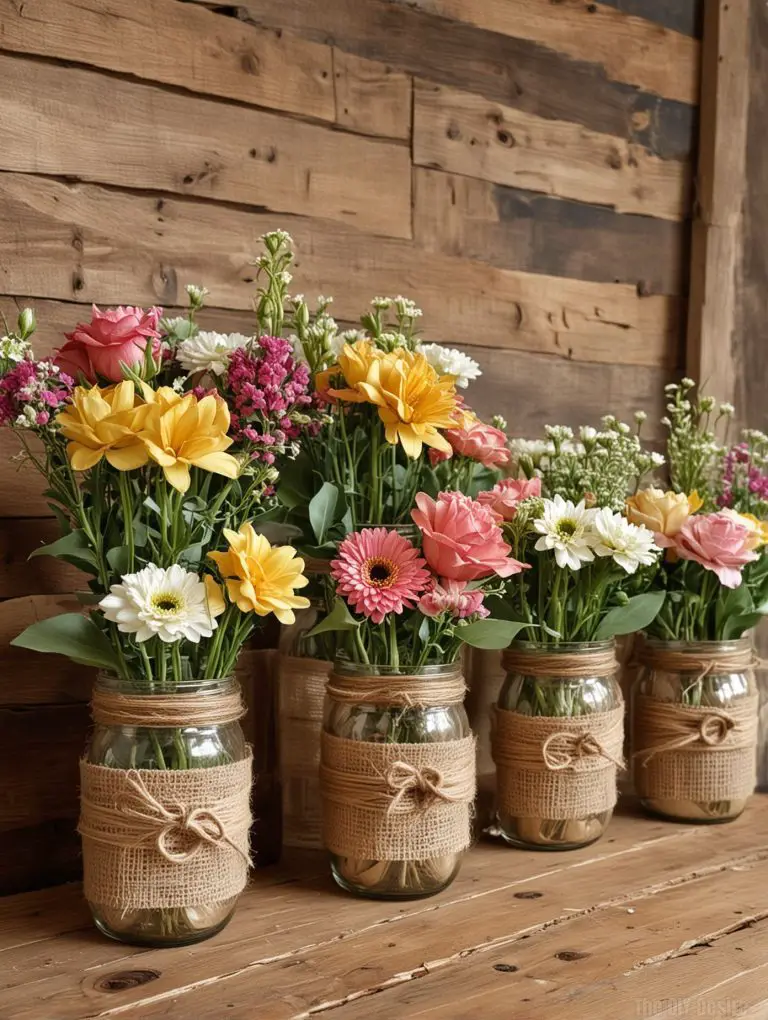
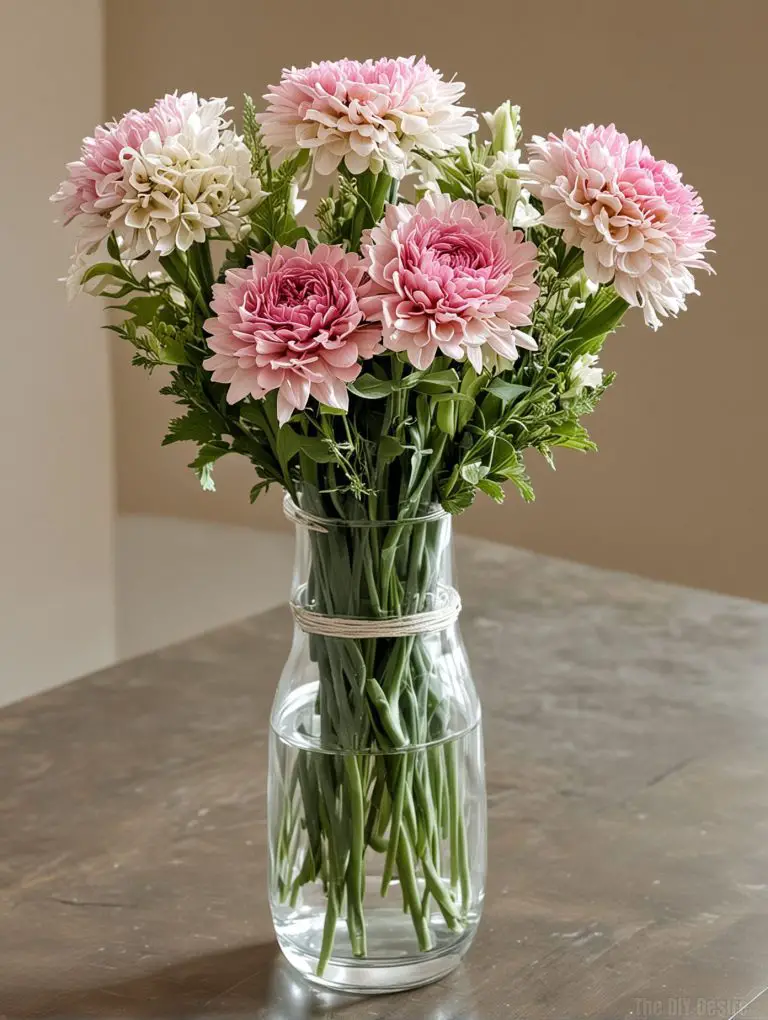
1. Rustic Mason Jar Vases
Begin by collecting mason jars, which serve as versatile vessels for your floral arrangements.
Transform the jars by wrapping them with burlap, a material that exudes a warm, country charm. Secure the burlap with twine, enhancing the rustic aesthetic.
Once your jars are dressed up, fill them with vibrant fresh flowers for a lively appearance or opt for faux blooms for a maintenance-free option.
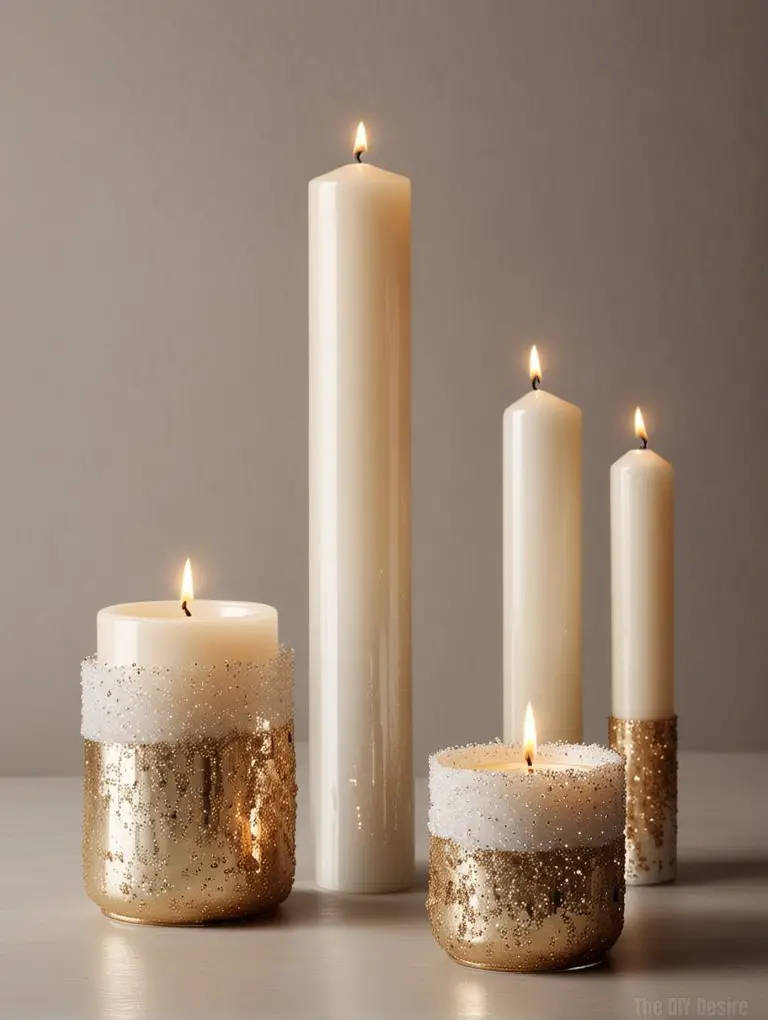
2. Elegant Candle Holders
By purchasing simple glass candle holders and standard white candles, you can transform ordinary items into striking centerpieces.
Consider applying glitter or metallic paint to the glass—these materials can catch the light beautifully, adding a touch of glamour to any table setting.
This DIY project allows for creativity: experiment with different paint techniques or patterns for a unique look.
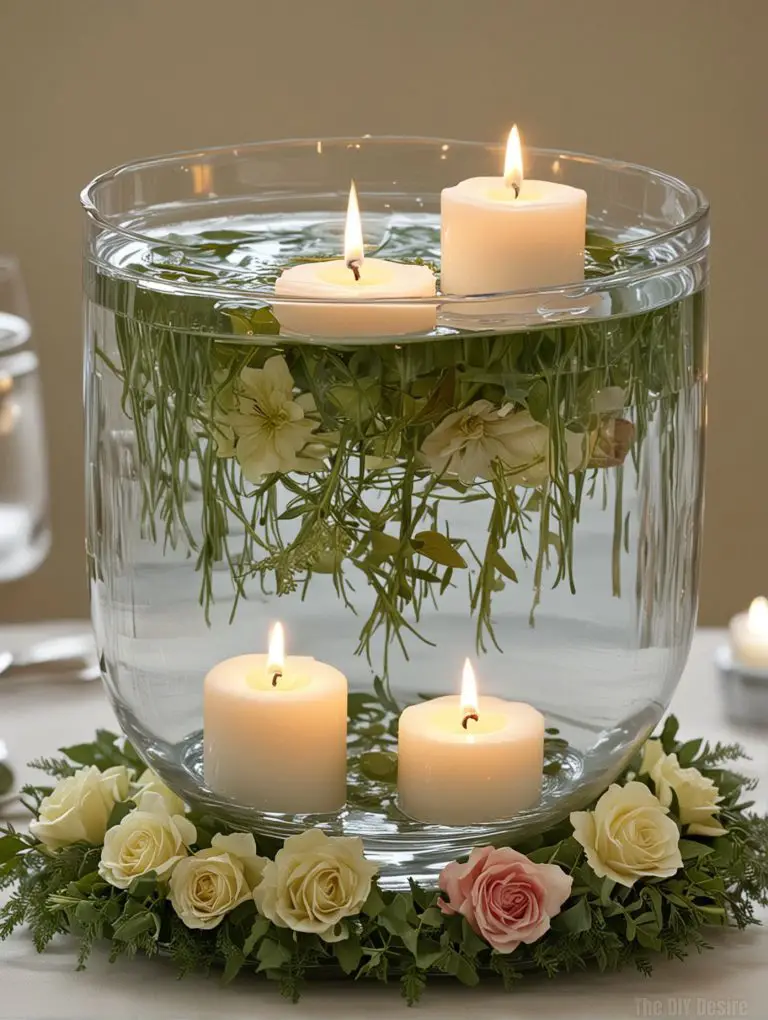
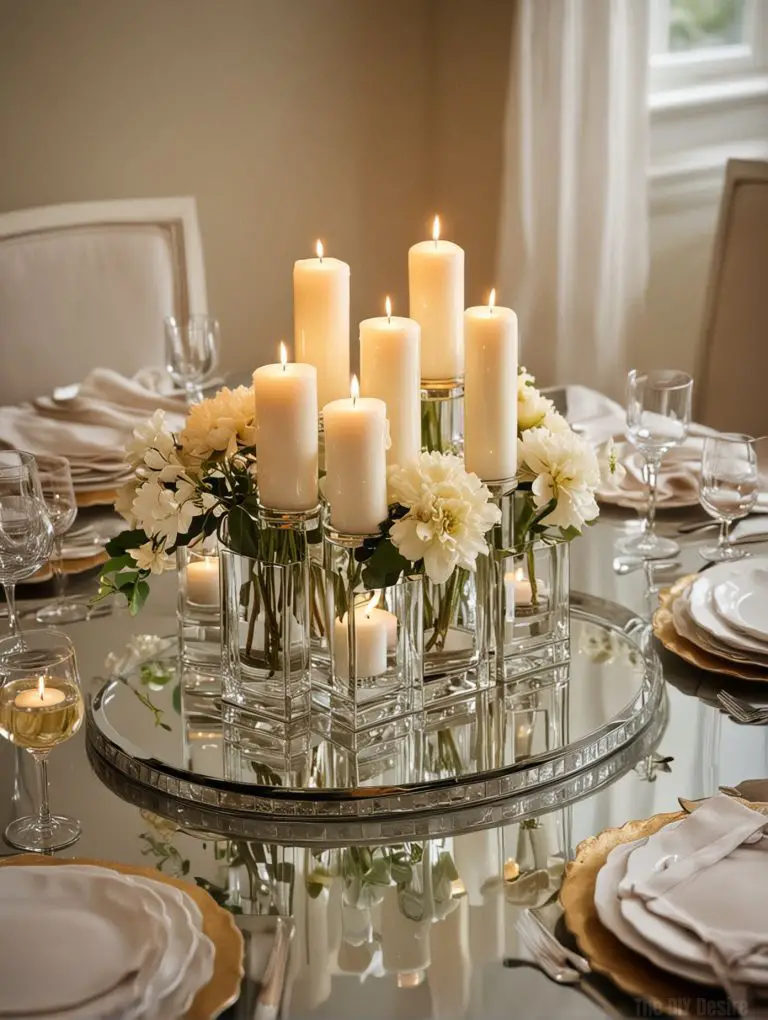
3. Floating Candle Centerpiece
With just a few simple items from your local Dollar Tree, you can craft a floating candle centerpiece that exudes elegance.
Start by selecting a clear glass bowl that complements your decor style. Fill it with clean water and place floating candles atop the surface, allowing them to dance gracefully as they flicker.
To enhance the visual appeal, incorporate faux flowers or greenery around the candles.
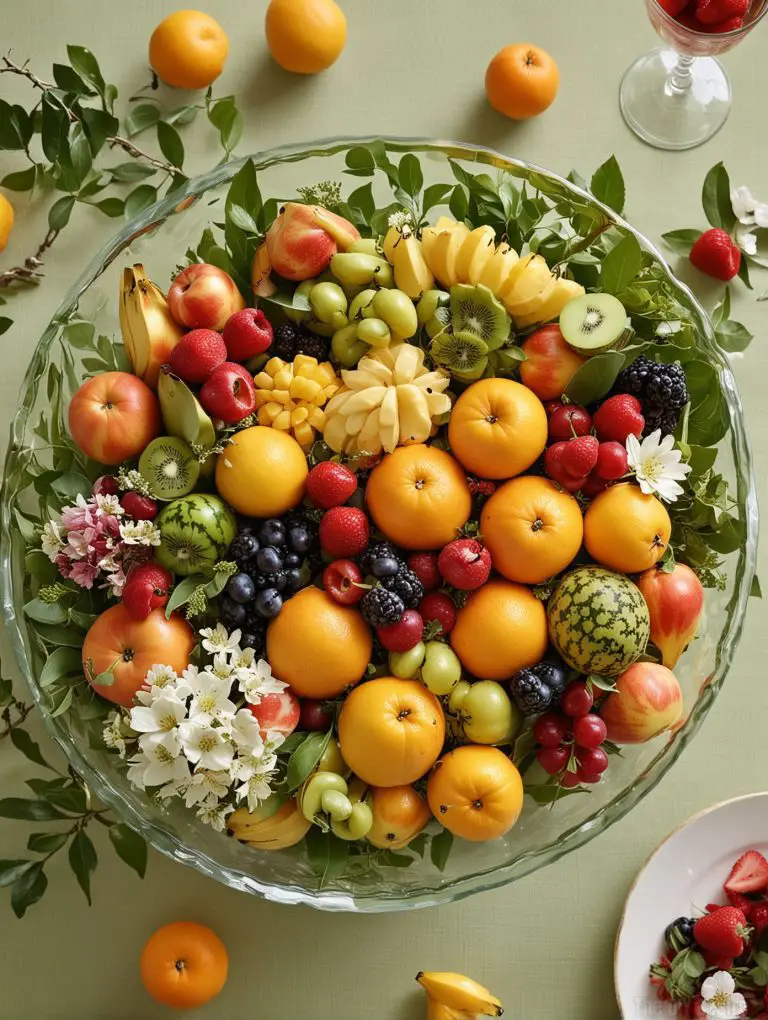
4. Seasonal Fruit Display
Imagine a stunning glass bowl filled to the brim with a colorful assortment of fruits like juicy apples, ripe oranges, and succulent berries.
This approach not only adds a visual appeal but also invites a delightful fragrance into the room.
Enhancing your centerpiece with sprigs of greenery or delicate flowers can elevate the aesthetic even further, creating an inviting atmosphere.
5. Candle and Pebble Display
Creating an eye-catching centerpiece doesn’t have to break the bank, and a simple candle and pebble display is the perfect example of this.
Start with a clear glass container to showcase the candle, allowing the flickering light to create an inviting ambiance.
Next, gather decorative pebbles or stones—these not only add texture but also allow you to personalise the arrangement to suit your style or theme.

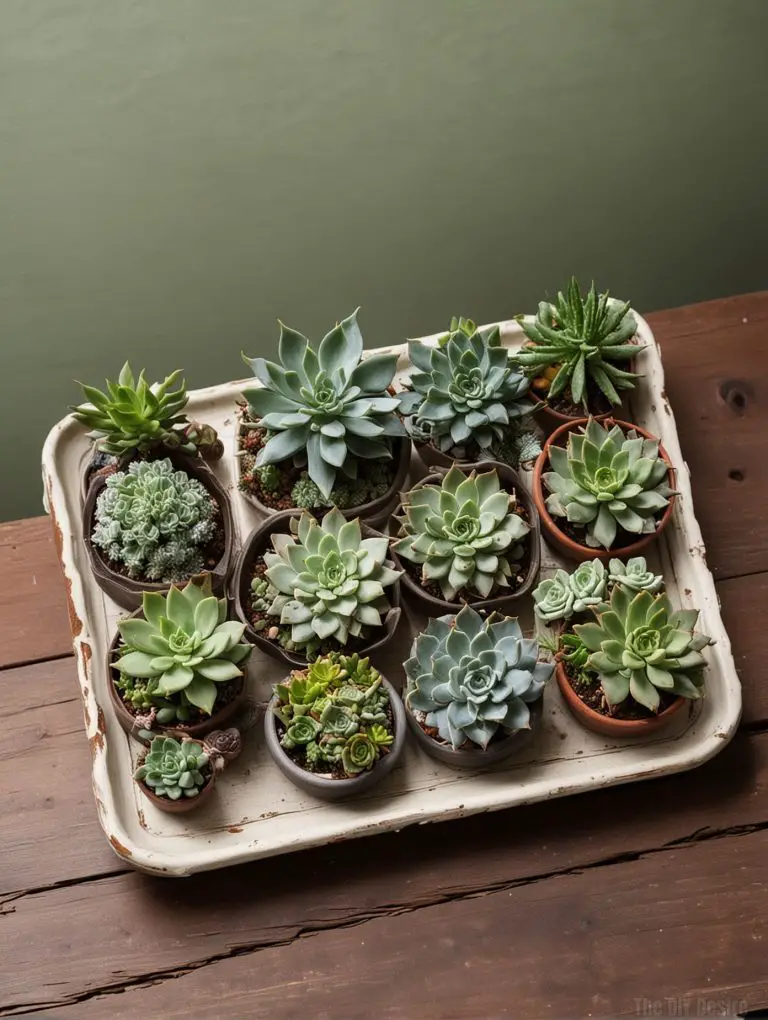
6. Succulent Planter
By selecting a variety of succulents, you can achieve an eye-catching display that thrives with minimal care.
Begin by choosing small containers that resonate with your style—think rustic terracotta or sleek glass.
Arrange these pots on a decorative tray to unify the display, adding a touch of elegance.
7. Mirror Plate Elegance
Start by selecting a mirror plate that suits your table’s style; its reflective surface adds depth and sophistication.
Next, gather an assortment of candles, fresh flowers, or decorative items that resonate with your event’s theme.
Arrange them artistically on the mirror, allowing their brilliance to bounce off the surface, enhancing both the lighting and visual interest of your table setting.
8. Floral Foam Arrangement
Start by selecting a block of floral foam, which serves as the foundation for your design.
Choose a variety of artificial flowers in different shapes and colors to add depth and visual interest. Cut the stems to your desired length, ensuring they sit snugly in the foam.
Once arranged, place the ensemble in a decorative vase or bowl that complements your home décor.
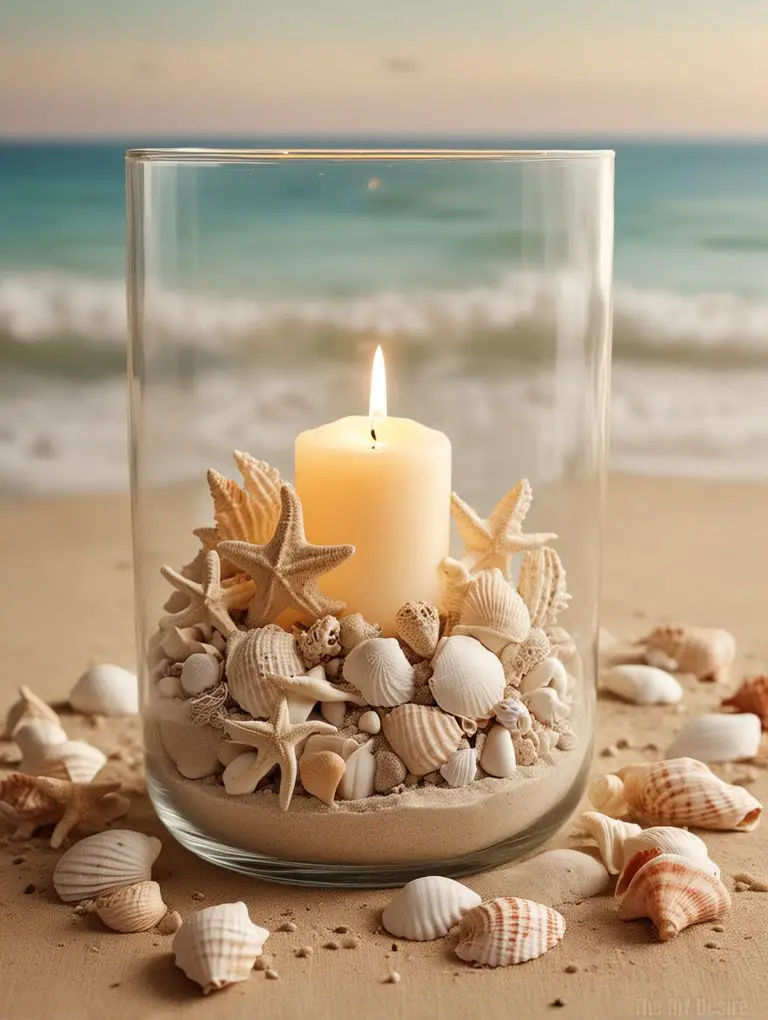
9. Coastal Themed Centerpiece
Start by filling the vase with a layer of fine sand, evoking the feeling of a sunny beach.
Next, add an assortment of seashells—consider using different shapes and sizes for visual interest, which will remind guests of beachcombing adventures.
Finally, place a candle at the center, ensuring it complements the overall color scheme—soft whites or ocean blues work beautifully.
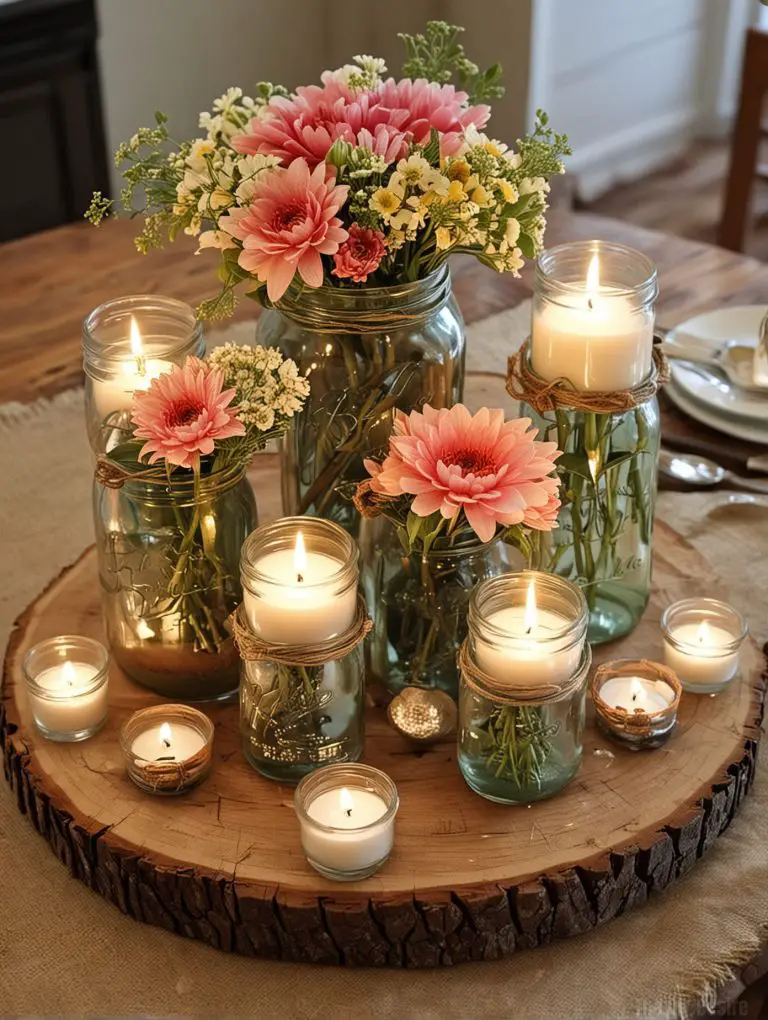
10. Rustic Wood Slice Display
Transform your event with a charming DIY Dollar Tree centerpiece that features rustic wood slices.
By using a sturdy wood slice as a base, you create an inviting foundation that matches any style.
Elevate the look by incorporating mason jars filled with fresh or faux flowers for a pop of color, or opt for an assortment of candles to infuse warmth and atmosphere.
You can also add small decorative items like pinecones or twinkling fairy lights for added flair.
11. Tea Light Terrariums
Imagine transforming a simple glass container into a charming tea light terrarium that elevates your home decor.
This easy DIY project starts with choosing a small glass container, perfect for holding a tea light.
Fill the base with lush moss or vibrant stones, creating a cozy, natural environment that enhances the ambiance of any room.

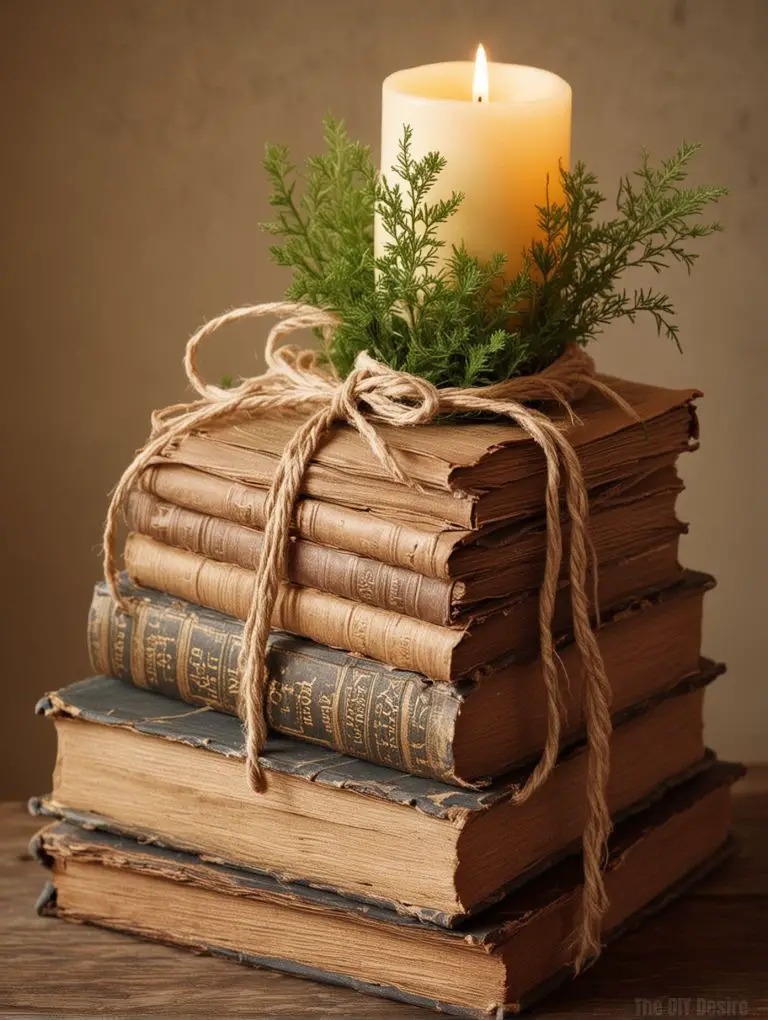
12. Book Stack Centerpiece
Creating a DIY book stack centerpiece is a charming way to infuse your space with personality and a touch of nostalgia.
Start by selecting a few old books that hold sentimental value or connect to your theme.
Once stacked, wrap them securely with twine—this not only adds a rustic flair but also ensures stability. The finishing touch involves placing a small vase or candle atop the stack.
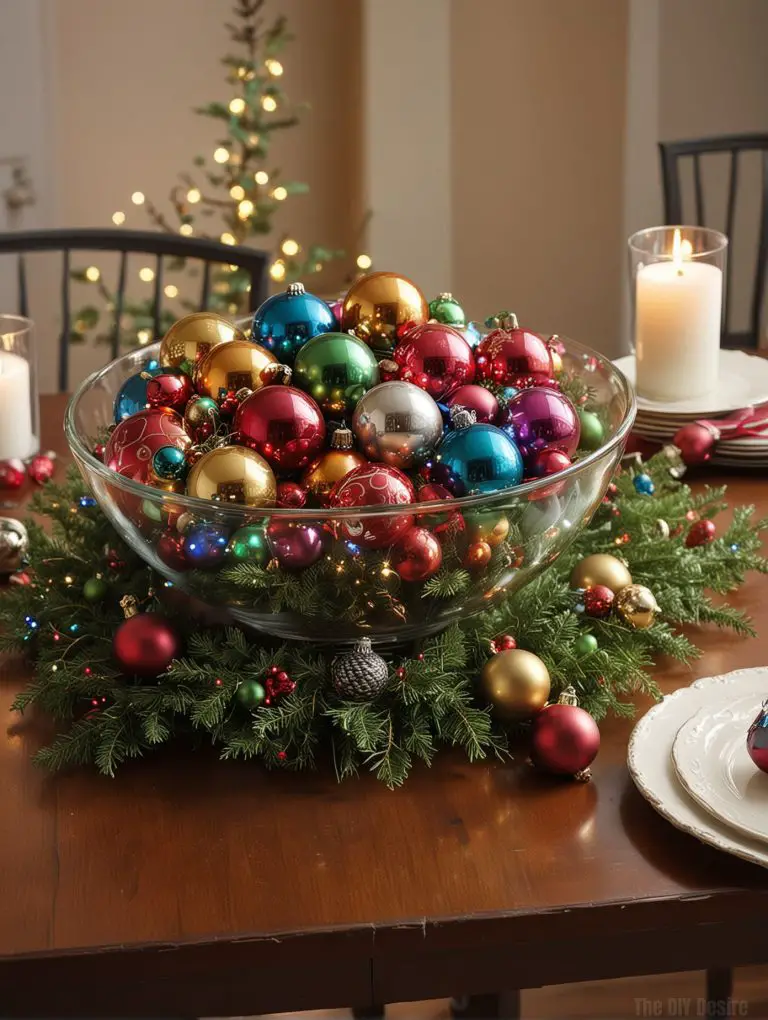
13. Holiday Ornaments Display
To craft a holiday-inspired display, start by choosing a clear glass bowl that best suits your style.
Next, fill it with an assortment of colorful ornaments—think shiny reds, vibrant greens, and sparkling golds. This vibrant mix will bring a dynamic feel to your table.
Adding some greenery will introduce a touch of nature, while string lights can infuse a warm, glowing ambiance.
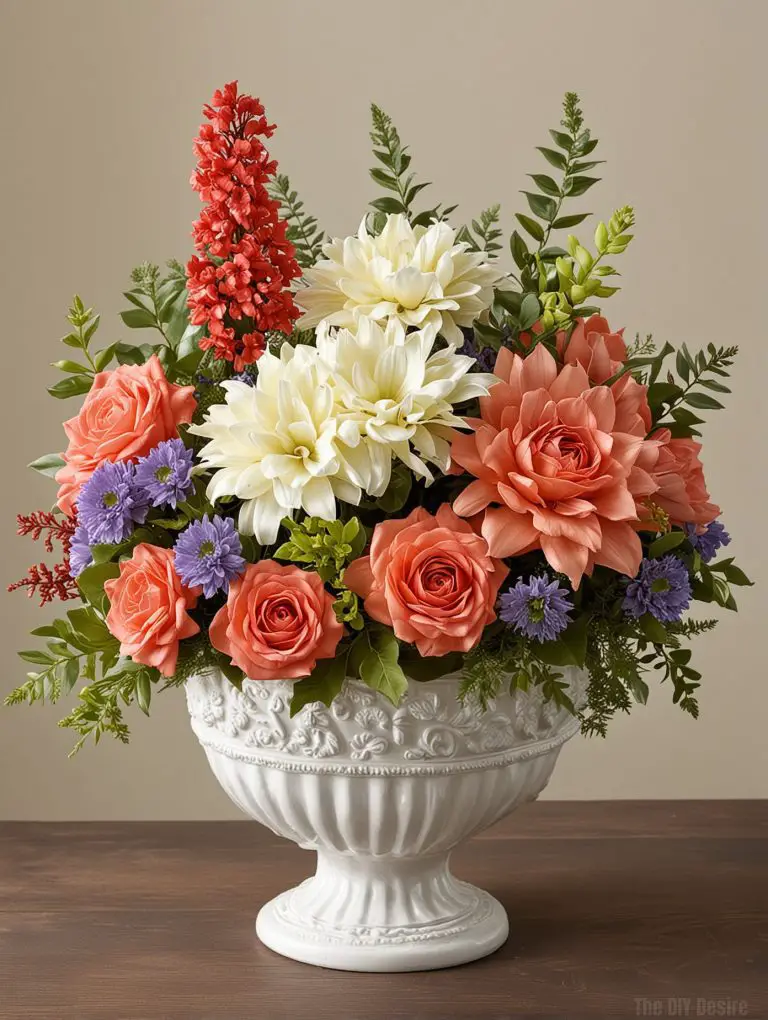
14. Simple Flower Bouquet
Begin by selecting a variety of artificial blooms that resonate with your desired theme or color scheme.
Once you’ve chosen your flowers, trim the stems to a uniform length for a polished look.
The next step is to wrap the stems in a decorative ribbon, adding flair and cohesion to your arrangement. Finally, place your bouquet in a clear glass vase to showcase the beauty of the flowers.
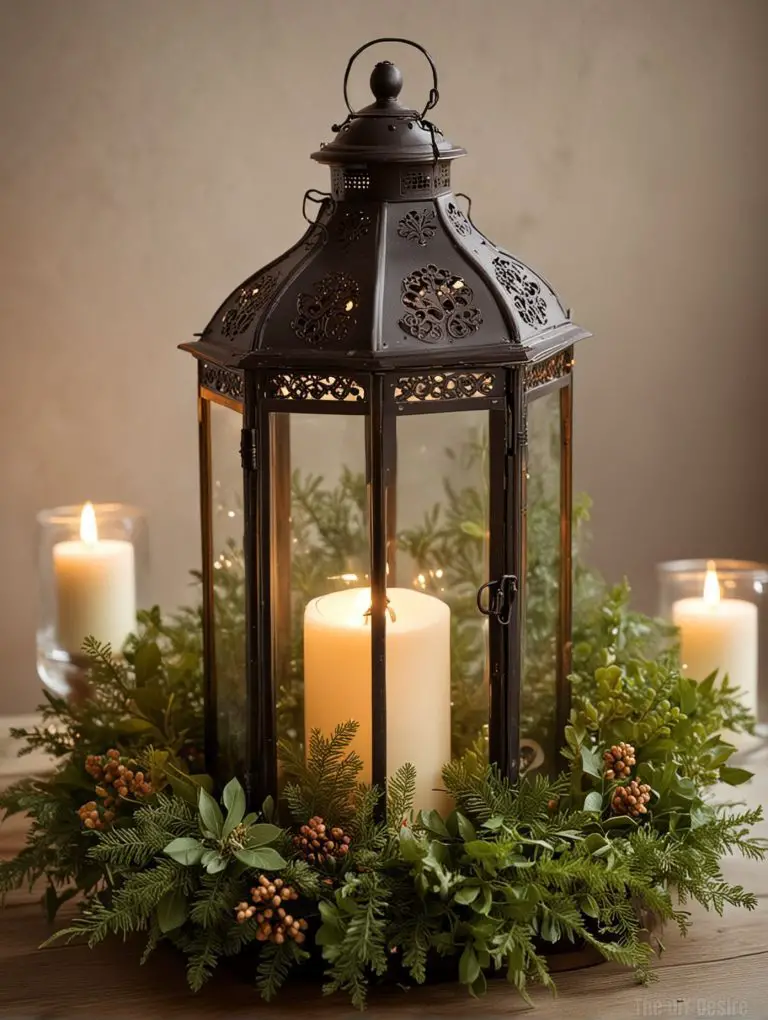
15. Lantern Centerpiece
Creating a stunning lantern centerpiece for your event is both simple and rewarding. Start by selecting a decorative lantern that complements your theme.
Inside, you can place a candle for a warm glow or fairy lights for a whimsical touch.
Surround the lantern with lush greenery or seasonal flowers, which adds texture and vibrancy to the display.
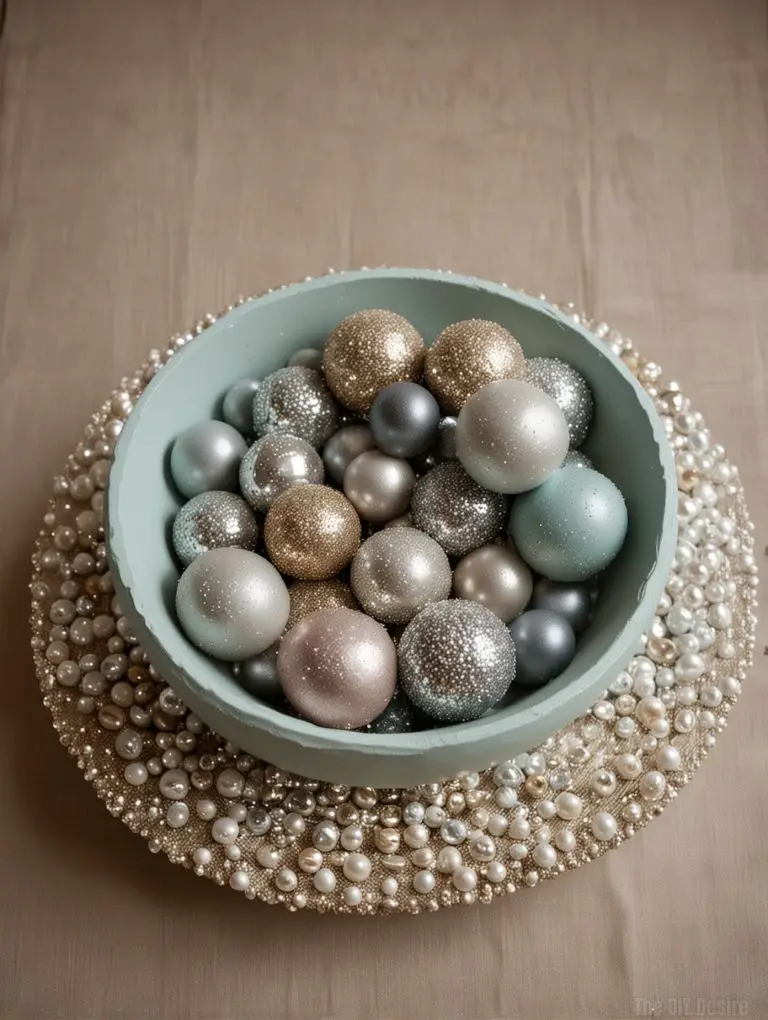
16. Decorative Bowl with Spheres
Start by selecting a decorative bowl that reflects your style. Next, fill it with foam spheres.
These lightweight, versatile pieces can be painted in vibrant colors or coated with glitter to catch the light and draw attention.
For a textured look, wrap them in fabric or even seashells for a beachy vibe.
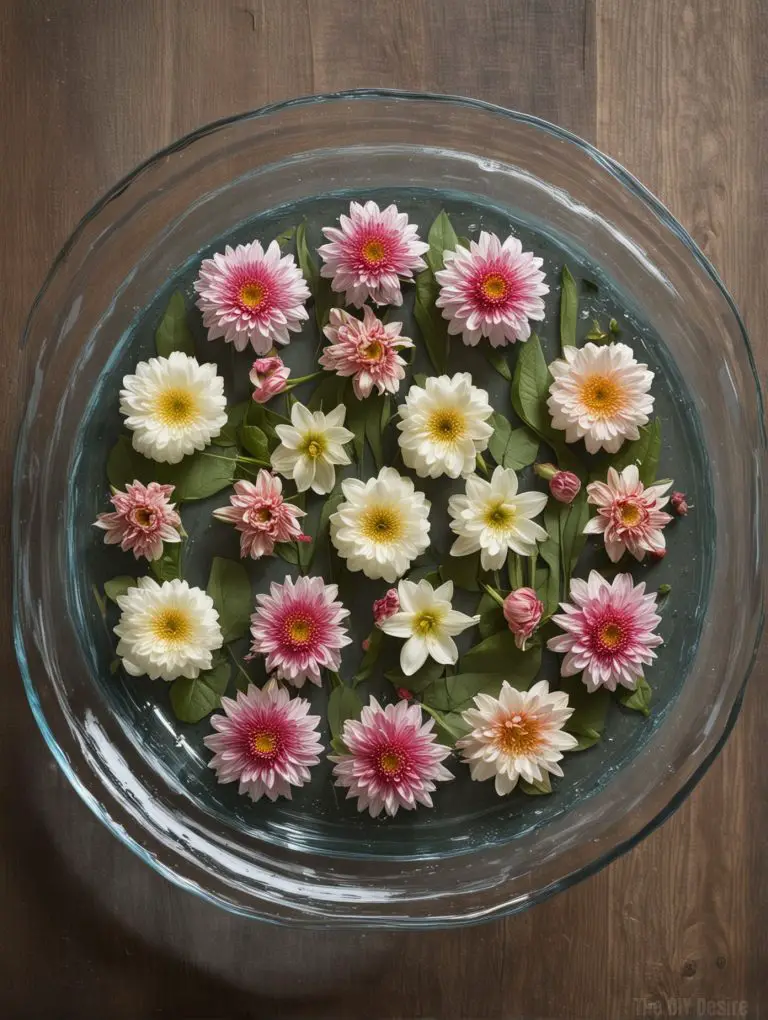
17. Floating Flower Arrangement
Start with a shallow glass dish, which serves as the perfect canvas for your arrangement. Fill it with clean water, ensuring that it’s deep enough to float the flowers effectively.
Select vibrant flower heads in various colors to introduce a lively touch. As you place them in the water, alternate the shades for a beautiful, eye-catching effect.
Finally, add a few floating candles to enhance the ambiance, especially as evening approaches.
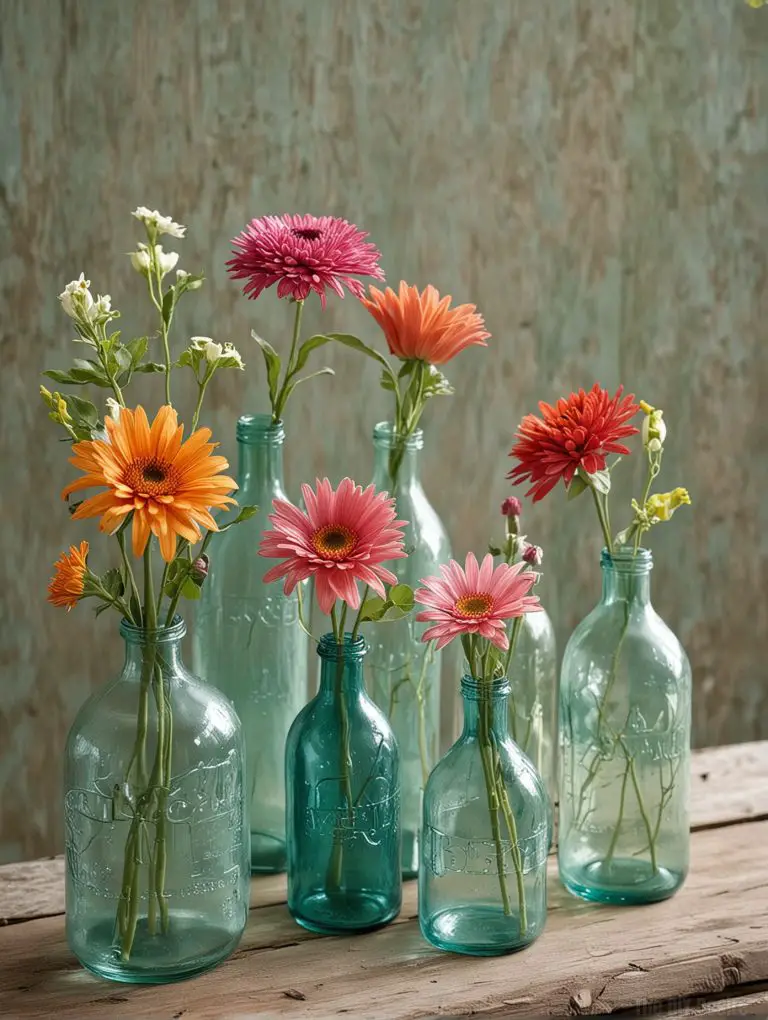
18. Glass Bottle Vases
Imagine a beautifully arranged table adorned with stunning glass bottle vases, each telling its own story through its unique shape and color.
These vases can vary significantly, with some slender and tall, reminiscent of elegant wine bottles, while others are short and robust, echoing the charm of vintage soda bottles.
When filled with vibrant seasonal flowers, they create a striking contrast that instantly draws the eye.
The play of light on the glass enhances the atmosphere, casting beautiful reflections that dance across the table.
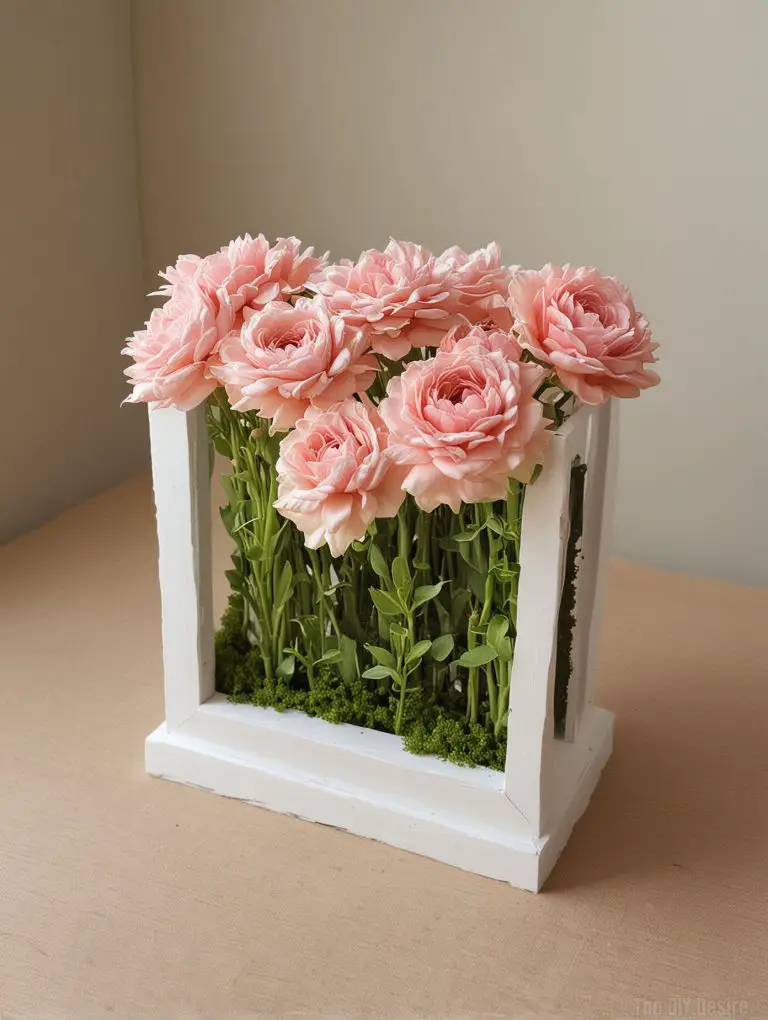
19. DIY Picture Frame Vase
Begin by selecting several frames in complementary styles or colours and glue them together to form a sturdy box.
Once your frame box is assembled, add a small vase or floral foam inside. This not only provides a base for your arrangement but also allows for flexible styling.
Fill the inner container with your choice of fresh flowers, faux blooms, or even greenery for a lush effect.
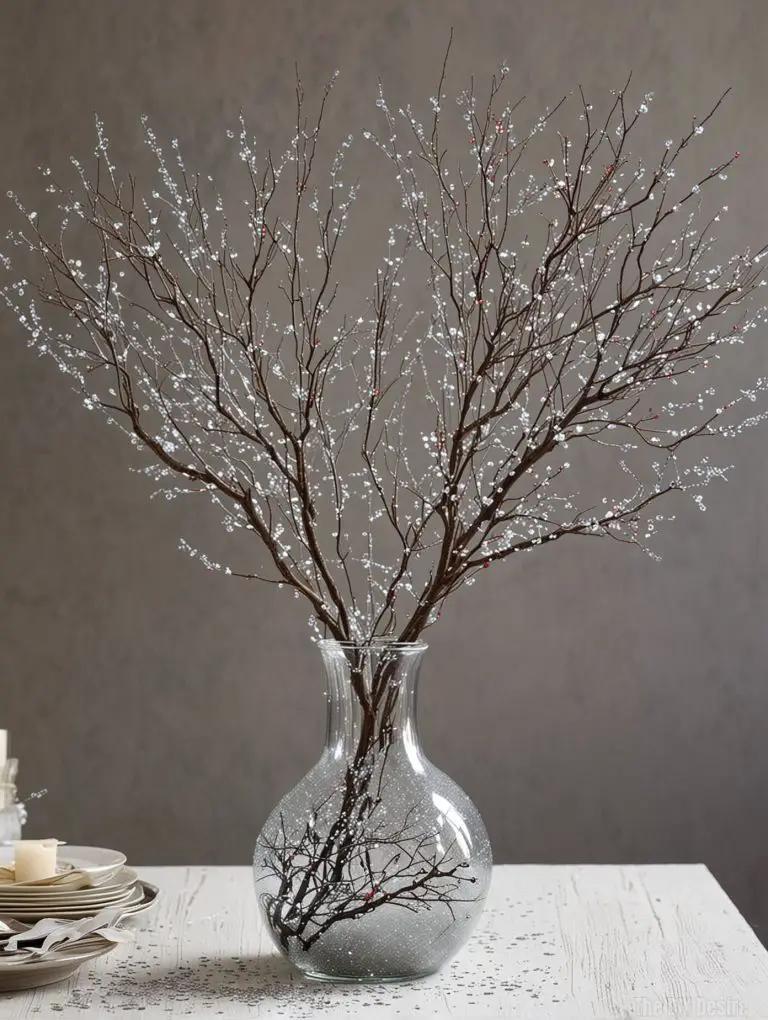
20. Glittery Branches
Start by collecting branches from your backyard or a local park; the more unique the shape, the better.
After thoroughly cleaning them, apply an adhesive spray for maximum stickiness. Then, generously sprinkle glitter over the branches, allowing it to catch the light and shimmer beautifully.
Once dry, arrange these eye-catching branches in a vase, perhaps adding some seasonal flowers or stones at the base for extra flair.